the makemode screen
A short tour of the screen — where everything is and what each part does, so you find your way around straight away.
the start screen, part by part
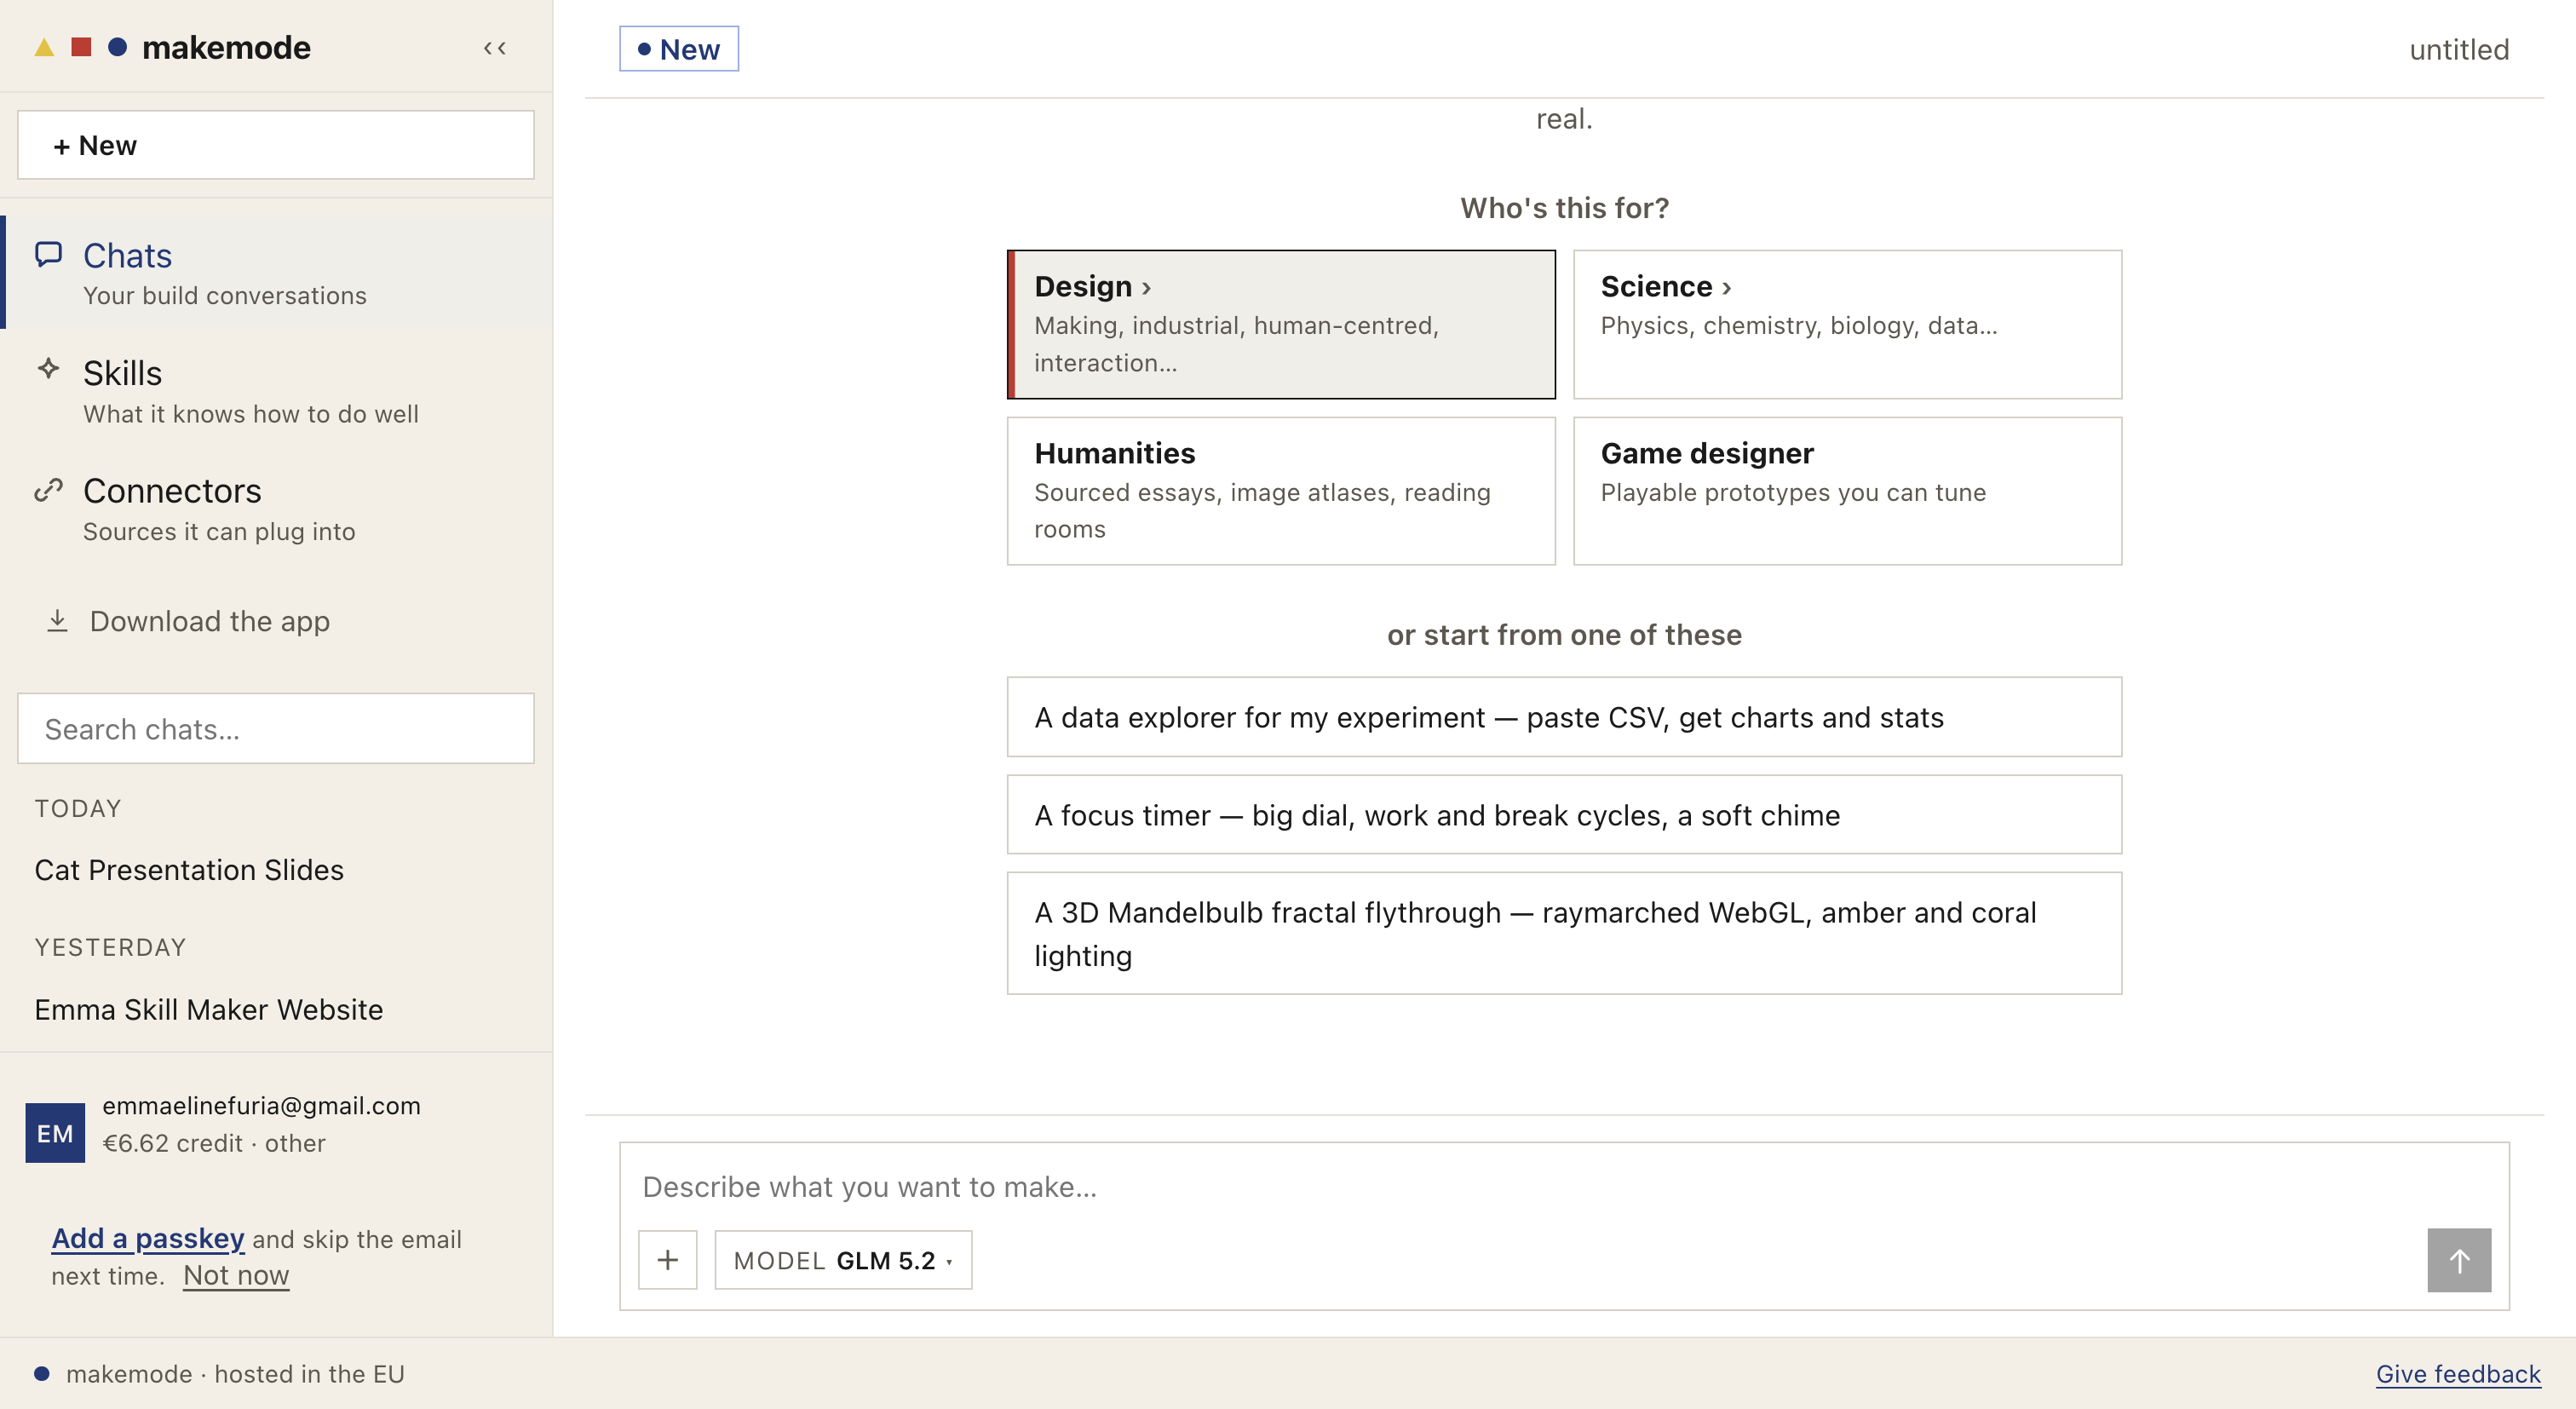
This is what you see when you open MakeMode. The rail on the left to navigate, the middle where you start a build, and the composer at the bottom. The numbers point out each part.
 1
2
3
4
5
6
1
2
3
4
5
6
- 1The rail. Jump between Chats, Skills and Connectors.
- 2+ New. Start a fresh build.
- 3Your chats. Every build conversation, searchable.
- 4Who's this for? Pick a persona to shape the build.
- 5Or start from an example. Tap a starter prompt.
- 6The composer. Describe what you want to make, pick a model, send.
skills — what it does well
Under Skills is what MakeMode knows how to do well. Search or browse, and open a card to read exactly what a skill tells the model. During a build it picks the ones that fit on its own.
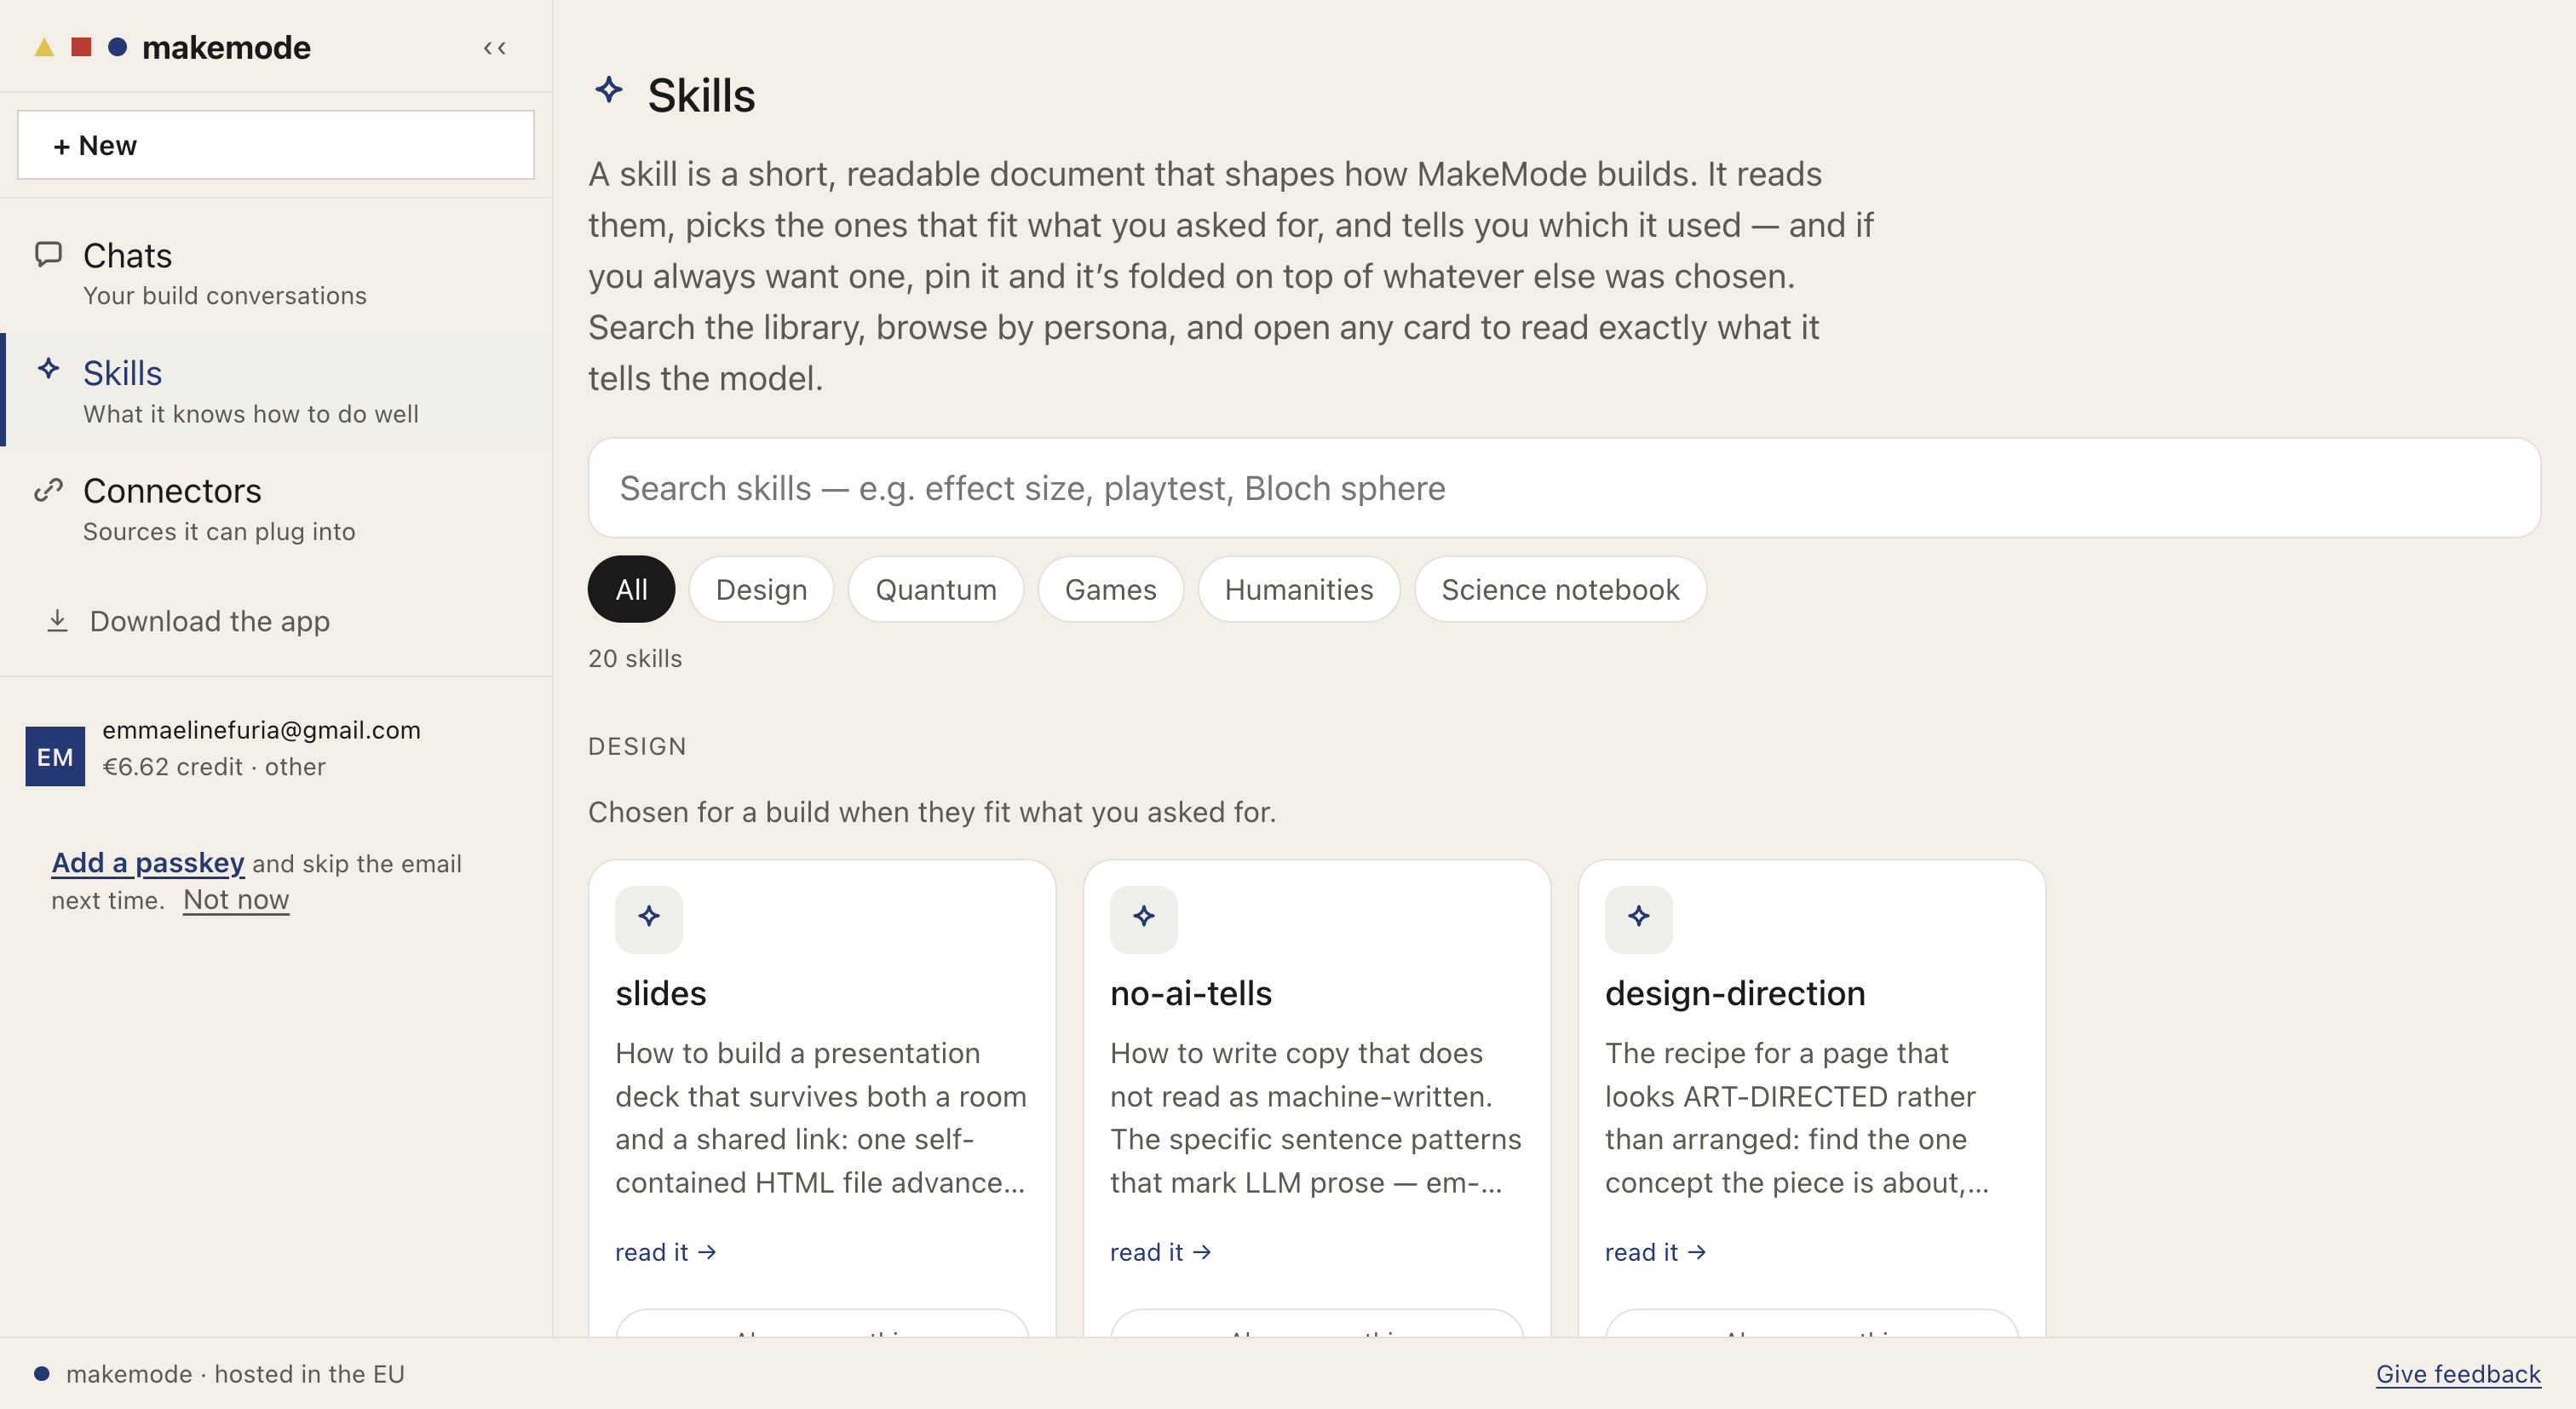
Skills — searchable and readable. (More in the skills tutorial.)
connectors — the sources
The Connectors are the sources MakeMode can pull from — all EU-reachable, nothing routed through a US host. Switch them on in your build or notebook.
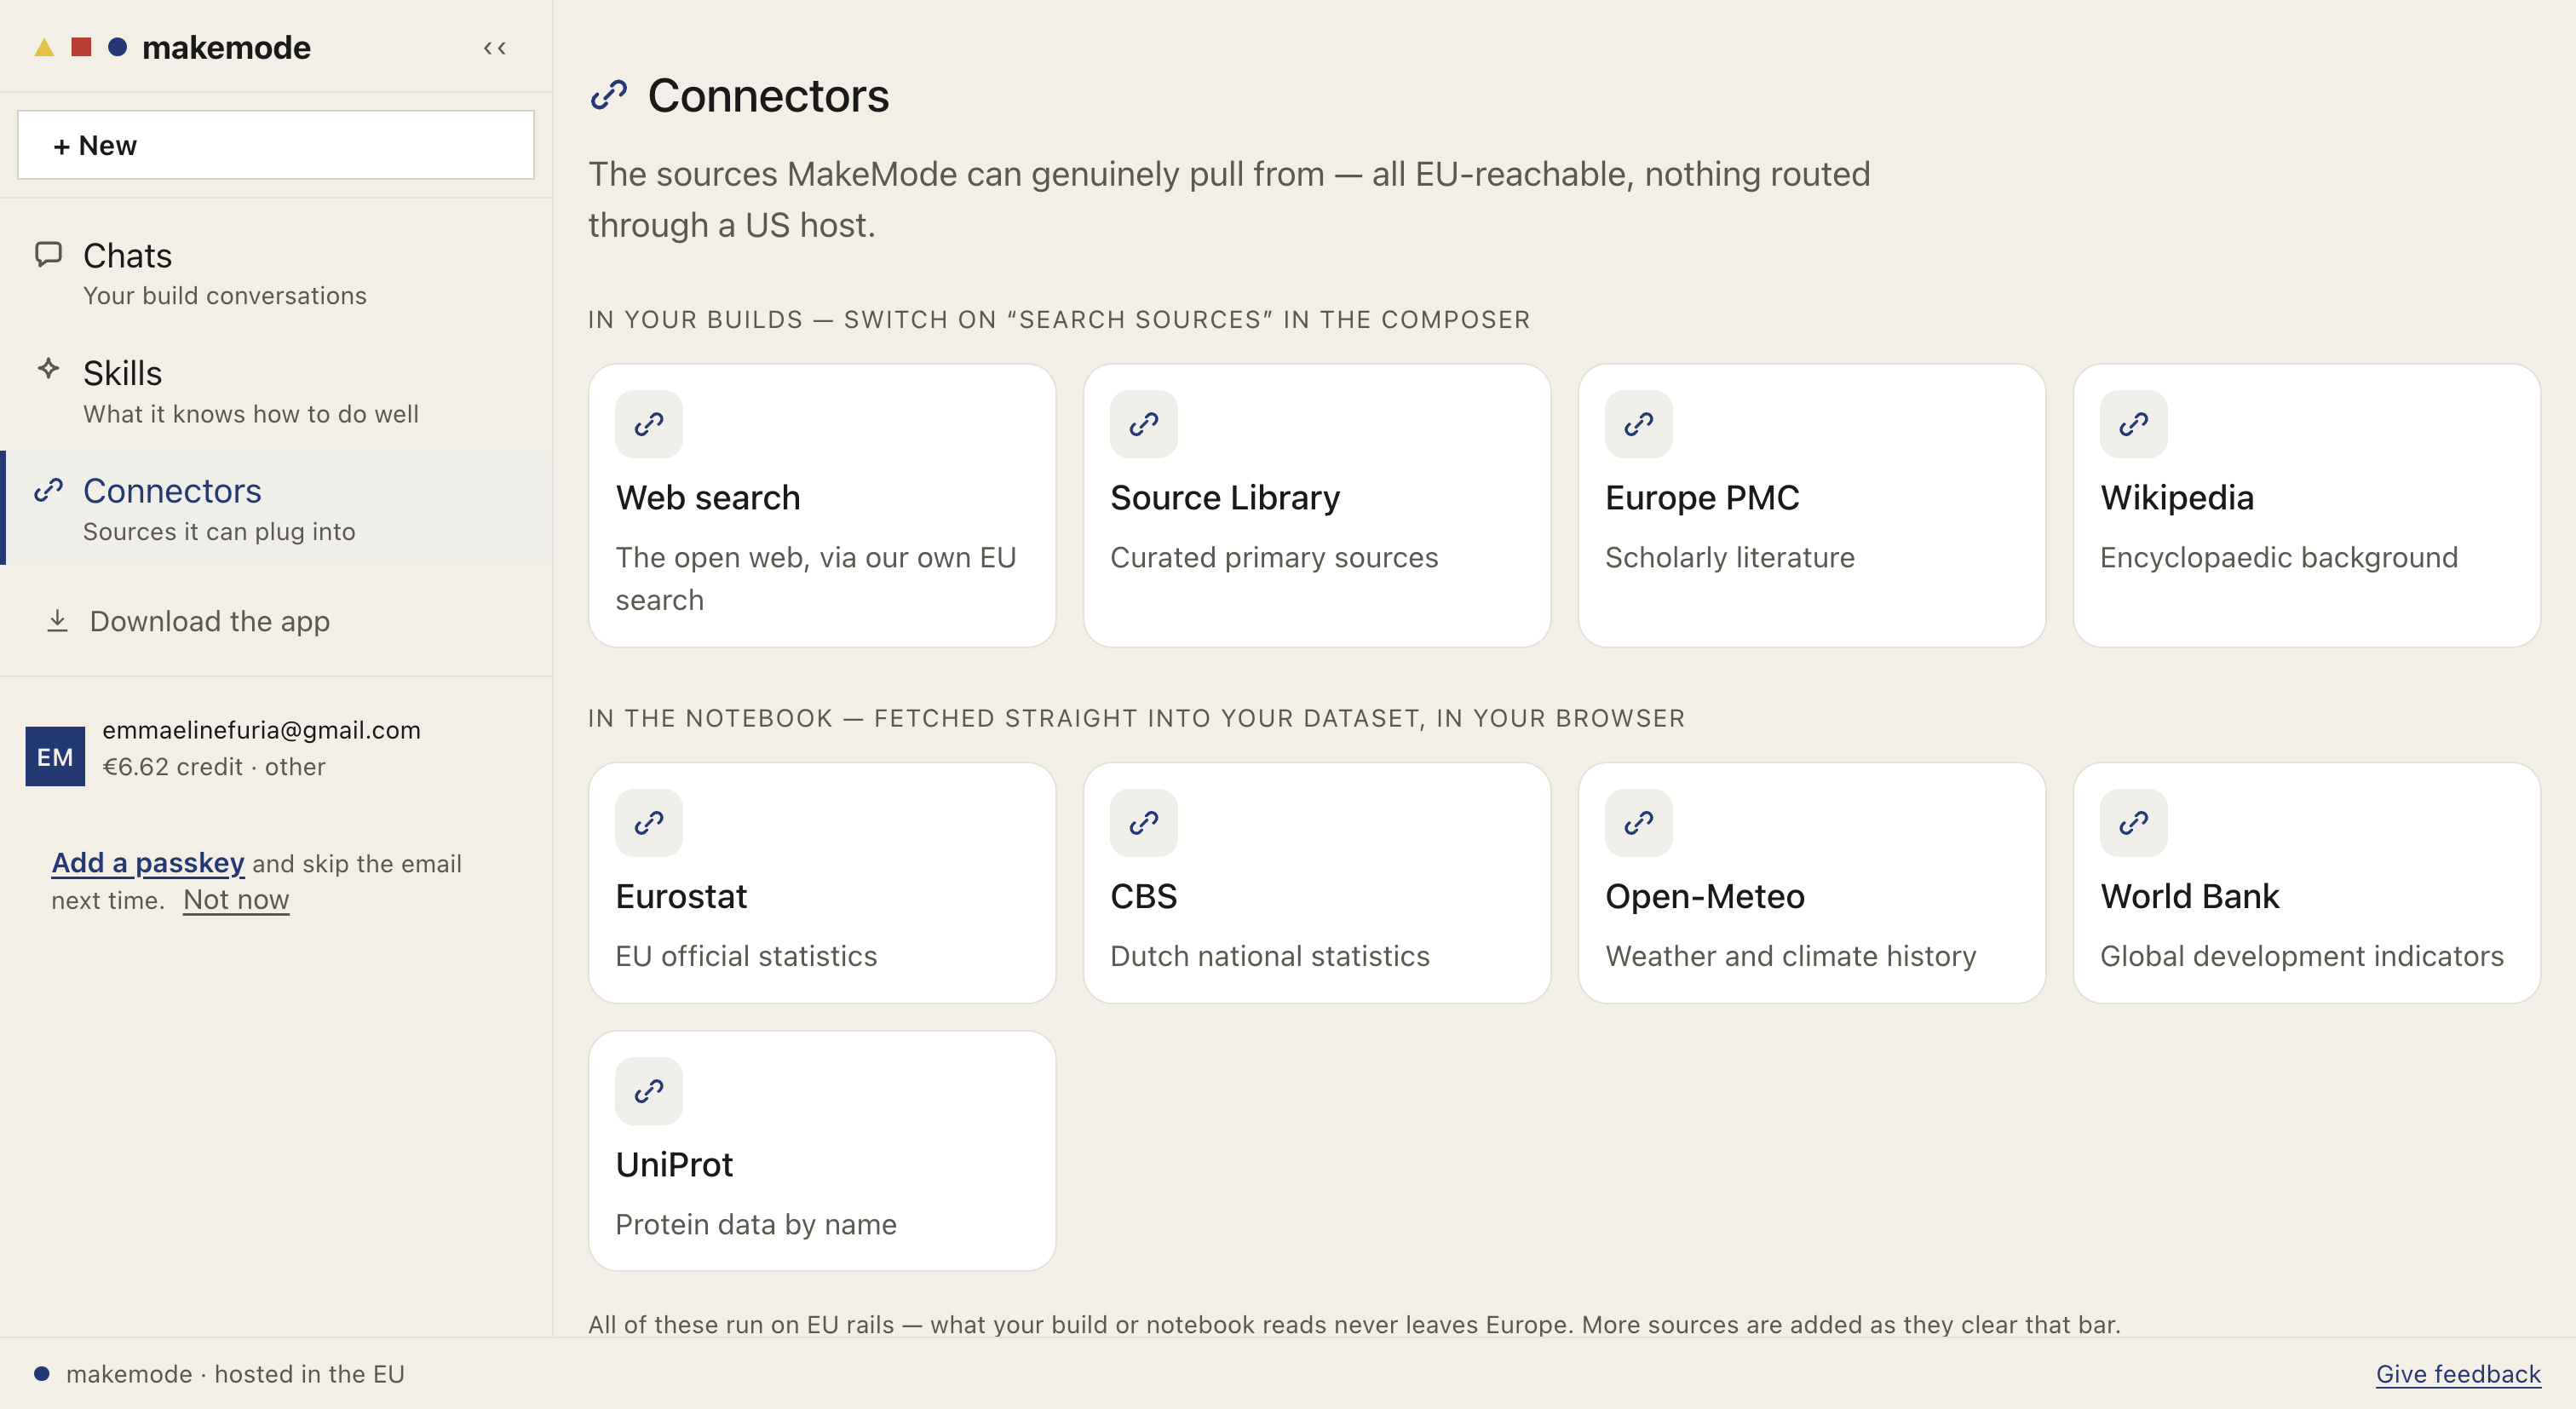
Connectors — EU sources; what your build reads never leaves Europe.
the build screen
Once you start a build the screen splits: your chat on the left, the live preview on the right. Describe a change to refine it, and press Publish & share or Download .zip when it's ready.
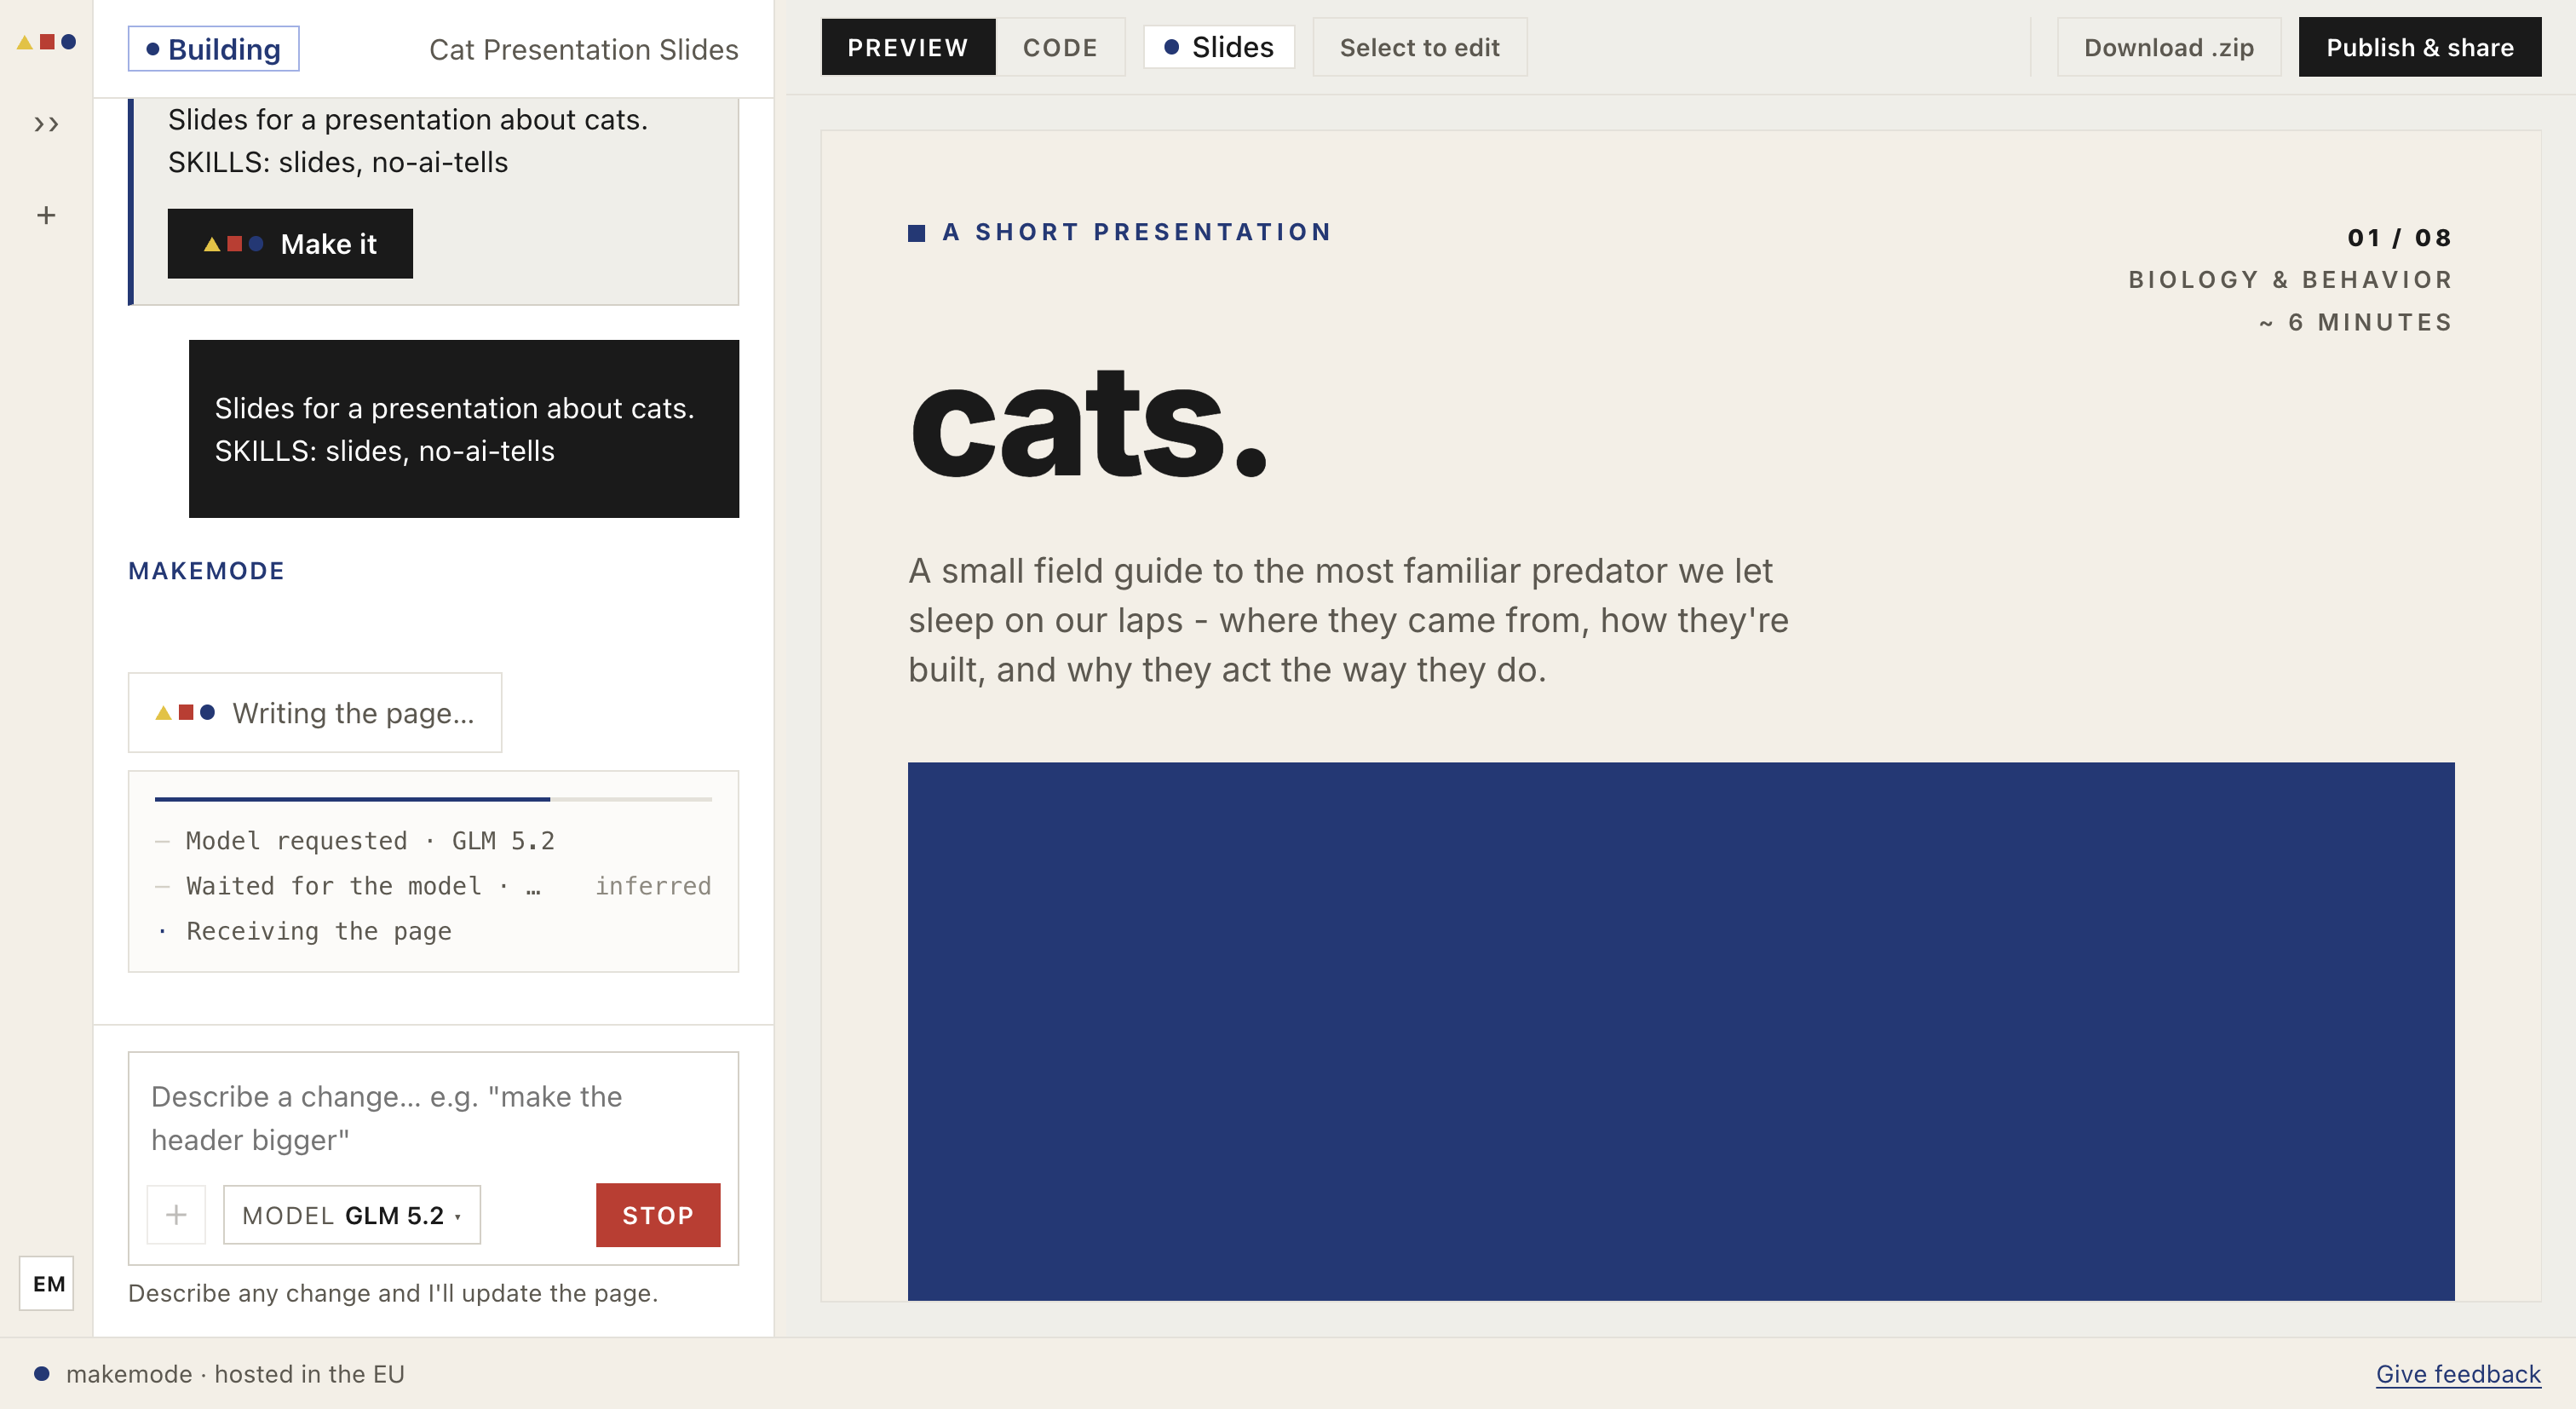
The build screen — chat on the left, live preview on the right.